먼저 Vertex Shader 코드는 다음과 같다.
VertexShader.glsl
#version 330

layout (location = 0) in vec3 a_pos; // 0번 attribute
layout (location = 1) in vec2 a_texcoord; // 1번 attribute

out vec2 v_texcoord;

uniform mat4 u_PVM;

void main()
{
    gl_Position = u_PVM * vec4(a_pos, 1.f);

    v_texcoord = vec2(a_texcoord.x, 1 - a_texcoord.y); // texcoord는 뒤로 넘겨줌
}
a_texcoord는 버텍스마다의 텍스쳐 좌표를 받는 변수이다.
v_texcoord는 a_texcoord를 받아 Rasterizer의 Bilinear Interpolation을 거쳐, fragment shader에서는 per-fragment 텍스쳐 좌표를 담고 있을 변수이다.
그런데 a_texcoord를 그냥 넘겨주지 않고 y값을 반전시킨 것을 볼 수 있는데,
이미지는 대부분 왼쪽 위를 원점으로 하지만, OpenGL의 텍스쳐는 왼쪽 아래를 원점으로 하기에 그 경우 그냥 넘기면 텍스쳐가 반전되어보인다.
이를 막기 위해 1에서 값을 빼어 반전시켜 준 것이다.
다음은 Fragment Shader 코드이다.
FragmentShader.glsl
#version 330

in vec2 v_texcoord;

uniform sampler2D u_texture; // 텍스쳐 유닛을 통해 텍셀을 떼어오는 샘플러

out vec4 color;

void main()
{
    color = texture(u_texture, v_texcoord); // 최종 픽셀의 색을 텍셀의 색으로
}
이제 v_texcoord는 fragment에 맞는 텍스쳐 좌표를 담고있으므로, u_texture에게 텍스쳐의 그 좌표에서 텍셀을 떼어오라고 하면 된다.
해당 함수가 바로 glsl의 texture() 함수이다. 첫번째 인자로 sampler, 두번째 인자로 vec2 texcoord를 받는다.
샘플러, 텍스쳐유닛, 텍스쳐의 관계가 헷갈릴 수 있는데, 정리하자면 다음과 같다.

우선, 실제 텍스쳐는 항상 텍스쳐 유닛에게 바인딩되어있다. 샘플러는 아직 텍스쳐를 모른다.
샘플링을 할 때, 샘플러는 자신에게 할당된 텍스쳐 유닛에 접근한다.
해당 텍스쳐 유닛을 통해 텍스쳐에 접근하여, texcoord에 맞는 텍셀을 떼어온다.
지금까지 텍스쳐를 0번 텍스쳐 유닛에 바인딩시켜주는건 했으므로, 이제 샘플러를 0번 텍스쳐 유닛에 연결시켜줄 차례이다.
그 방법은 단순히 sampler2D 변수 u_texture에 인티저 값 0을 할당하는 것이다.
// Shader.cpp 중 일부

// 쉐이더 내 u_texture 변수의 위치를 파악
uniformSampler = glGetUniformLocation(shaderID, "u_texture");
// main.cpp 중 일부
uniformSampler = shaderList[0].GetSamplerLocation();
// 샘플러를 0번 유닛에 할당
glUniform1i(uniformSampler, 0);
이렇게 해주면 샘플러, 텍스쳐 유닛, 텍스쳐 간의 연결이 모두 완료된다.
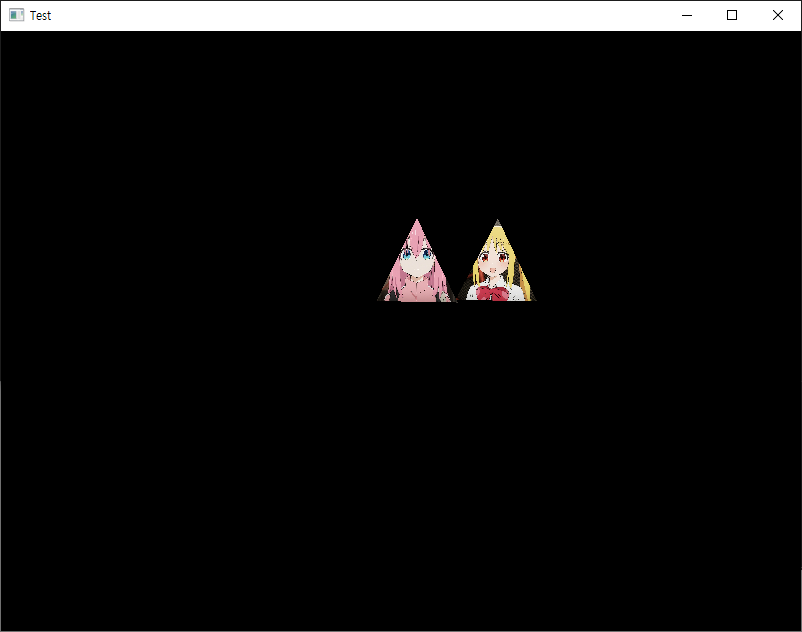
bocchi.jpg, nijika.jpg를 모두 사용해보기 위해 텍스쳐를 두개 로드하여, 0번 텍스쳐 유닛에 바꿔 달아가면서 사용할 것이다.
main.cpp:
/*생략*/
int main()
{
    /*생략*/

    Texture texture1("Textures/bocchi.jpg");
    texture1.LoadTexture();
    Texture texture2("Textures/nijika.jpg");
    texture2.LoadTexture();

    GLuint uniformPVM = 0;
    GLuint uniformSampler = 0;

    // 창이 닫힐 때까지 반복
    while (!mainWindow.getShouldClose())
    {
        /*생략*/

        shaderList[0].UseShader();
        uniformPVM = shaderList[0].GetPVMLocation();
        uniformSampler = shaderList[0].GetSamplerLocation();

        // 샘플러를 0번 유닛에 할당
        glUniform1i(uniformSampler, 0);

        glm::mat4 identityMatrix(1.f);
        glm::mat4 T = glm::translate(identityMatrix, glm::vec3(-2.f, 0.f, -5.f));
        glm::mat4 R = glm::rotate(identityMatrix, rotationOffset, glm::vec3(0.f, 1.f, 0.f));
        glm::mat4 S = glm::scale(identityMatrix, glm::vec3(2.f));

        glm::mat4 model = T * R * S;
        glm::mat4 view = camera.calculateViewMatrix(); // glm::lookAt 함수의 리턴값을 받아온다.
        glm::mat4 projection = glm::perspective(45.f, mainWindow.getBufferWidth() / mainWindow.getBufferHeight(), 0.1f, 100.f);

        glm::mat4 PVM = projection * view * model;

        glUniformMatrix4fv(uniformPVM, 1, GL_FALSE, glm::value_ptr(PVM));

        texture1.UseTexture(); //0번 텍스쳐 유닛에 bind
        meshList[0]->RenderMesh(); // 첫번째 피라미드 그리기


        T = glm::translate(identityMatrix, glm::vec3(2.f, 0.f, -5.f)); // Translate만 조금 바꿔서
        model = T * R * S;
        PVM = projection * view * model;

        glUniformMatrix4fv(uniformPVM, 1, GL_FALSE, glm::value_ptr(PVM));

        texture2.UseTexture(); //0번 텍스쳐 유닛에 bind
        meshList[0]->RenderMesh(); // 두번째 피라미드 그리기

        rotationOffset += 0.00003f;

        glUseProgram(0);

        mainWindow.SwapBuffers();
    }
    return 0;
};
참고로, 저렇게 한 버텍스 자료만으로 Model Matrix(Translate, Rotate, Scale)만 다르게 해서 모델을 여러개 배치하는 것을 Instancing이라고 한다.
예를 들어 땅에 수많은 풀이 깔려있는 화면을 만들 때, 굳이 풀 하나하나 버텍스를 쏴줄 필요 없이 풀 하나에 해당되는 버텍스만 가지고 T, R, S를 다르게 하여 많은 양의 풀을 심을 수 있는 것이다.
실행 결과:
다음 이미지들은 필터링 메소드에 따른 비교이다.


확실히 지난 포스팅 Texture Filtering에서 다룬 대로, GL_NEAREST의 경우 자글거리는 느낌이 들고, GL_LINEAR의 경우 부드럽게 처리되는 느낌이 든다.
'OpenGL > 공부' 카테고리의 다른 글
| [OpenGL] Phong Reflection Model - 구현 (0) | 2024.06.19 |
|---|---|
| [OpenGL] Phong Reflection Model - 개요 (0) | 2024.06.15 |
| [OpenGL] Textures (5) - 적용 (VAO 수정) (2) | 2024.06.13 |
| [OpenGL] Textures (4) - 로드(stb_image), 생성, 바인딩(Texture Unit) (0) | 2024.06.13 |
| [OpenGL] Textures (3) - Wrapping (0) | 2024.06.12 |