카메라 좌우 전환을 만드는데는 블루프린트 쪽이 더 직관적일 것 같아, C++에서 함수를 BlueprintImplementableEvent를 사용하여 선언하였다.
그리고 현재 카메라가 좌우 중 어느 쪽에 있는지를 나타내는 플래그 변수를 선언하였다.
// KannaCharacter.h
UFUNCTION(BlueprintImplementableEvent)
void SwitchCameraPos();

UPROPERTY(BlueprintReadWrite, meta = (AllowPrivateAccess = "true"))
bool IsCameraAtRight
SwitchCameraPos의 구현 내용은 다음과 같다.

플레이어가 탭을 눌러 수동으로 카메라를 좌우로 전환할 수 있도록,
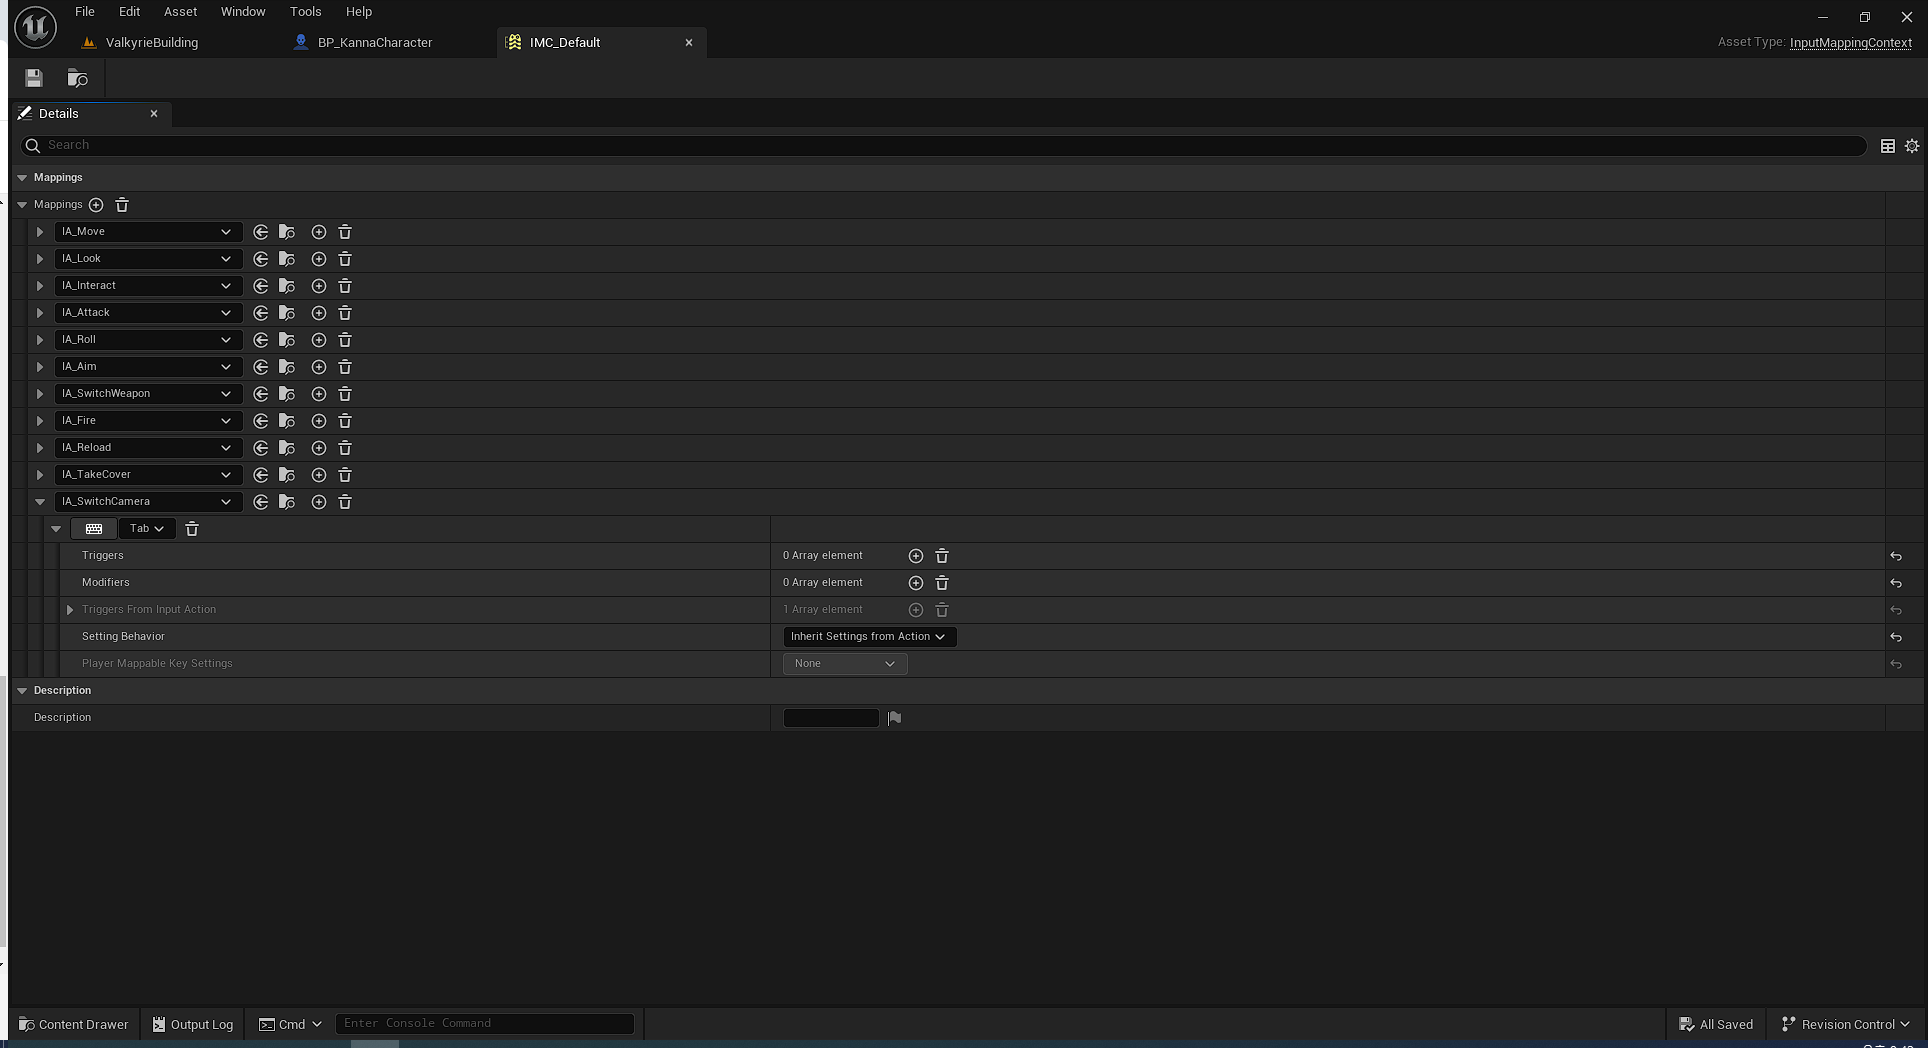
InputAction을 만들고 Input Mapping Context에 추가해준 뒤, SwitchCameraPos 함수에 인풋을 바인딩해주었다.
UPROPERTY(EditAnywhere, BlueprintReadOnly, Category = Input)
UInputAction* SwitchCameraAction;
// Called to bind functionality to input
void AKannaCharacter::SetupPlayerInputComponent(UInputComponent* PlayerInputComponent)
{
Super::SetupPlayerInputComponent(PlayerInputComponent);
if (UEnhancedInputComponent* EnhancedInputComponent = CastChecked<UEnhancedInputComponent>(PlayerInputComponent))
{
EnhancedInputComponent->BindAction(MoveAction, ETriggerEvent::Triggered, this, &AKannaCharacter::Move);
MoveActionBinding = &(EnhancedInputComponent->BindActionValue(MoveAction));
EnhancedInputComponent->BindAction(LookAction, ETriggerEvent::Triggered, this, &AKannaCharacter::Look);
EnhancedInputComponent->BindAction(AimAction, ETriggerEvent::Triggered, this, &AKannaCharacter::Aim);
EnhancedInputComponent->BindAction(AimAction, ETriggerEvent::Completed, this, &AKannaCharacter::ReleaseAim);
EnhancedInputComponent->BindAction(InteractAction, ETriggerEvent::Triggered, this, &AKannaCharacter::Interact);
EnhancedInputComponent->BindAction(SwitchWeaponAction, ETriggerEvent::Triggered, this, &AKannaCharacter::SwitchWeapon);
EnhancedInputComponent->BindAction(AttackAction, ETriggerEvent::Triggered, this, &AKannaCharacter::Attack);
EnhancedInputComponent->BindAction(RollAction, ETriggerEvent::Triggered, this, &AKannaCharacter::Roll);
EnhancedInputComponent->BindAction(FireAction, ETriggerEvent::Triggered, this, &AKannaCharacter::Fire);
EnhancedInputComponent->BindAction(ReloadAction, ETriggerEvent::Triggered, this, &AKannaCharacter::Reload);
EnhancedInputComponent->BindAction(CoverAction, ETriggerEvent::Triggered, this, &AKannaCharacter::TakeCover);
EnhancedInputComponent->BindAction(SwitchCameraAction, ETriggerEvent::Triggered, this, &AKannaCharacter::SwitchCameraPos);
}
}
이제 카메라 좌우 이동을 구현했으므로, 엄폐 상태 캐릭터의 이동 방향에 맞춰 카메라가 좌우로 이동하도록 해줄 차례이다.
엄폐 상태에서는 캐릭터의 이동을 Move()가 아닌 CoverTrace() 함수에서 다룬다. 따라서 카메라 이동도 이 안에서 시킬 것이다.
그 전에, CoverTrace가 매우 복잡했으므로 조금의 리팩토링도 해주었다.
지지난 포스팅까지 구현한 바로는, 캐릭터의 왼쪽과 오른쪽에서 각각 벽면으로 라인트레이싱을 한 후, 두 결과에 따라 캐릭터의 좌우 이동 여부를 결정했었다.
그 두번의 라인트레이싱을 별도의 함수로 빼둔 것이다. 함수의 이름은 CheckLeftRightHit로 지었다.
또한 LeftHit, RightHit를 저장할 변수를 클래스 변수로 미리 만들어두었다.
	// KannaCharacter.h
    //캐릭터의 오른쪽에서 정면으로 라인트레이싱 한 결과를 담는 변수
	bool RightHit;
	//캐릭터의 오른쪽에서 정면으로 라인트레이싱 한 결과를 담는 변수
	bool LeftHit;
다음은 이 두 변수에 결과를 넣어주는 CheckLeftRightHit 함수의 내부이다.
void AKannaCharacter::CheckLeftRightHit(FVector& WallDirection, FVector& ActorLocation, FHitResult& HitResult, FCollisionQueryParams& CollisionParameters)
{
	//Right Vector는 벽면을 바라보고 섰을 때 오른쪽 방향을 나타낸다. 먼저 Rotator를 만들고, 거기서 벡터를 뽑아낸다.
	//변수명을 RightRotator로 했는데, RightVector를 뽑아내기 위한 것이어서 그렇지 실제 방향은 WallDirection이다.
	//MakeRotFromX는 X축에만 기반하여 Rotator를 만든다는 의미이다.
	FRotator RightRotator = UKismetMathLibrary::MakeRotFromX(WallDirection);
	FVector RightVector = UKismetMathLibrary::GetRightVector(RightRotator);

	//캐릭터의 살짝 우측에서 벽 방향으로 라인트레이싱을 수행할 것이다.
	FVector RightStart = ActorLocation + RightVector * 45.f;
	FVector RightEnd = RightStart + WallDirection * 200.f;

	//라인트레이싱이 맞았다면 RightHit이 true
	RightHit = GetWorld()->LineTraceSingleByChannel
	(HitResult,
		RightStart,
		RightEnd,
		ECollisionChannel::ECC_GameTraceChannel1,
		CollisionParameters);

	//이번엔 같은 작업을 왼쪽에서 할 것이다.
	//WallDirection의 반대 방향 Rotator를 만들고, 거기서 RightVector를 뽑아내면 그건 캐릭터 기준 왼쪽이된다.
	FRotator LeftRotator = UKismetMathLibrary::MakeRotFromX(WallDirection * (-1.f));
	FVector LeftVector = UKismetMathLibrary::GetRightVector(LeftRotator);

	FVector LeftStart = ActorLocation + LeftVector * 45.f;
	FVector LeftEnd = LeftStart + WallDirection * 200.f;

	//Set Left Hit
	LeftHit = GetWorld()->LineTraceSingleByChannel(
		HitResult,
		LeftStart,
		LeftEnd,
		ECollisionChannel::ECC_GameTraceChannel1,
		CollisionParameters);
}
이제 CoverTrace 함수가 CheckLeftRightHit를 호출하도록 하였으며, 함수 맨 마지막 부분에서 이동 방향과 카메라의 위치가 맞지 않으면 카메라의 좌우 전환을 수행하도록 하였다.
다음은 CoverTrace 함수의 내부이다.
void AKannaCharacter::CoverTrace()
{
	FHitResult HitResult;

	FCollisionQueryParams CollisionParameters;
	CollisionParameters.AddIgnoredActor(this);

	FVector ActorLocation = GetActorLocation();
	UCharacterMovementComponent* Movement = GetCharacterMovement();

	//현재 PlaneConstraintNormal은 플레이어의 이동 제한 평면의 법선벡터이다. 이는 벽면에서 바깥쪽으로 가는 방향이다.
	//원하는 벡터는 캐릭터가 벽을 향하는 방향의 벡터이므로, -1을 곱해준다.
	FVector WallDirection = Movement->GetPlaneConstraintNormal() * (-1.f);

	CheckLeftRightHit(WallDirection, ActorLocation, HitResult, CollisionParameters);

	//MoveActionBinding은 이동 인풋 값을 가져다쓰기 위해 만든 것이다. 이에 대한 설명도 후술할 것이다.
	FVector2D MoveVector = MoveActionBinding->GetValue().Get<FVector2D>();
	//PlayerRightVector는 카메라로 보는 시점 기준 오른쪽 방향 벡터이다.
	FVector PlayerRightVector = UKismetMathLibrary::GetRightVector(UKismetMathLibrary::MakeRotator(0.f, 0.f, GetControlRotation().Yaw));

	//왼쪽, 오른쪽 둘다 엄폐 공간이 남아있다면, 어느쪽이든 갈 수 있다.
	if (LeftHit && RightHit)
	{
		if (MoveVector.X != 0.f) //좌우 이동이 0이 아니라면
		{
			//앞에 엄폐물이 있는지 라인트레이싱으로 한번 더 확인하고, 법평면 제한을 한번 더 걸어준 뒤, AddMovementInput을 통해 이동시킨다.
			// 제한을 다시 거는 이유는, 실린더 모양 엄폐물에서도 좌우이동이 자연스럽게 되도록 하기 위해서이다.
			if (GetWorld()->LineTraceSingleByChannel(
					HitResult,
					ActorLocation,
					ActorLocation + WallDirection * 200.f,
					ECollisionChannel::ECC_GameTraceChannel1,
					CollisionParameters)
				)
			{
				Movement->SetPlaneConstraintNormal(HitResult.Normal);

				AddMovementInput(PlayerRightVector, MoveVector.X);
			}

		}
	}
	else // 엄폐공간이 좌우 모두 자유롭게 남아있지 않은 경우
	{
		float MovementScale; //필요에 따라 0이 될 수도 있다.

		//오른쪽 공간있고, 오른쪽 이동 인풋이 들어왔다면 스케일을 그대로 해준다.
		if (RightHit && MoveVector.X > 0)
		{
			MovementScale = MoveVector.X;
		}
		//왼쪽도 마찬가지
		else if (LeftHit && MoveVector.X < 0)
		{
			MovementScale = MoveVector.X;
		}
		// 남은 공간의 위치와 이동 방향이 어긋날 때는 MovementScale를 0으로 하여 이동하지 못하게한다.
		else
		{
			MovementScale = 0;
		}
		// 계산된 MovementScale에 따라 캐릭터를 이동시킨다.
		AddMovementInput(PlayerRightVector, MovementScale);
	}

	// 캐릭터의 이동 방향과 카메라의 위치가 맞지 않는다면
	if ((MoveVector.X > 0 && !IsCameraAtRight) || (MoveVector.X < 0 && IsCameraAtRight))
	{
		SwitchCameraPos();
	}
}
다음은 현재까지의 테스트 영상이다.
다음 포스팅에서는 서서 엄폐 상태에서의 조준을 다룰 것이다.
'언리얼 엔진 5 > TPS 게임' 카테고리의 다른 글
| [UE5] 블루아카이브 TPS게임 개발일지 (37) - 엄폐 시스템 구현 7 (0) | 2024.01.10 |
|---|---|
| [UE5] 블루아카이브 TPS게임 개발일지 (36) - 엄폐 시스템 구현 6 (0) | 2024.01.10 |
| [UE5] 블루아카이브 TPS게임 개발일지 (34) - 엄폐 시스템 구현 4 (0) | 2024.01.10 |
| [UE5] 블루아카이브 TPS게임 개발일지 (33) - 엄폐 시스템 구현 3 (5) | 2024.01.07 |
| [UE5] 블루아카이브 TPS게임 개발일지 (32) - 엄폐 시스템 구현 2 (0) | 2024.01.07 |